Last week I posted a brief essay on the history of the artist trading card. You can re-read that here if you like. Briefly, Artist Trading Cards (ATC) started back in the 1990s when an artist from Zurich decided to catalogue his art on trading cards that could be swapped with other artists. It’s become a fun hobby for many artists and crafters who use it to improve their skills, market their art, or simply trade and collect interesting art in a miniature form.
There aren’t many “rules” to making an ATC, but today I thought it would be fun to explain what is required and what’s expected if you want to start creating them for yourself.
How to make an ATC
There are only three requirements (that I’m aware of) for ATCs:
They must be 2.5 x 3.5 inches in size.
The ground (the canvas, fabric or paper that the art is created on) must be durable, similar to any other trading card.
They must never be traded for money.
Outside of these three things, you can use any materials, style or technique you wish. I’m listing six steps that I follow when making cards. Not every artist does all of this, however. I think it depends on how seriously you take your art. I want my cards to be representative of my work as a whole, so I put as much effort into them as I would a larger piece of art. Some artists don’t think of them that way – they simply enjoy creating pretty cards and aren’t concerned with the artistic process. As I said before, there are no rules about this, so do what you think is appropriate. If it isn’t fun, then why bother?
Step 1. Choose an appropriate card material
Most of my cards are on Bristol or 140 lb watercolor paper. I would not suggest using any paper less than 90 lb weight unless you plan on gluing the paper to something sturdy, such as cardstock or shirt cardboard. (Do they even call it shirt cardboard any more?) I don’t like attaching a back becaue I’ve found that the gluing process can really mess up my art. If the paper gets too wet, it tears, or it wrinkles, and if I use a glue stick I have to be very careful to get it all the way to the edges and not transfer glue to the front of the card. But I don’t have much practice with it, so I stick to heavier paper.
I don’t necessarily use archival paper or materials, nor do I care if the materials are lightfast. The cards are likely to be housed in a box or binder, and they aren’t something that I think will last a lifetime, so I don’t go out of my way to spend more money on supplies.
Step 2. Decide on subject matter
If you are creating cards for a swap, the subject may already be given to you. In that case, you only have to make sure that your subject matter follows the rules of the swap.
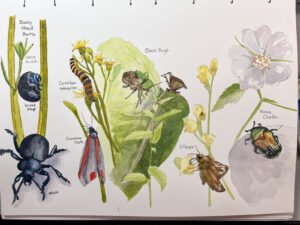
But if you are creating cards to trade, you are free to choose whatever subject interests you in whatever style you like. I recommend that it be simple, especially when you’re beginning. It’s difficult to put many things on this small sized canvas at any level of detail. When I’m stuck for an idea, I peruse old swaps or think of something seasonal. Searching Pinterest will produce lots of inspiration. Let your spirit run wild!
Step 3. Create thumbnails and plan the composition
Many people would bypass this step, but I’m the person who struggles without it. I have difficulties seeing in my mind’s eye what the final card would look like, so I spend some time doodling out ideas before I decide on the composition. This way I’m able to manage the focal point and the way the eye will flow through the picture. I’ve also found that planning helps me to get everything I want into the small space. Have you ever worked on a sketch and found out you’ve run out of paper on the side where you wanted to put something interesting? I have this problem with urban sketching sometimes, and those sketches are at least twice the size of my cards. So I plan.
Thumbnails are nothing more than quick, tiny sketches of ideas. The less detail they have, the better. I’ll generally make a few of these to see where I want to put the focal point and get an overall feel for the layout. Then I’ll sketch out an actual sized-composition to see how everything fits together. Sometimes I’ll even do a tonal study, just to make sure I like the composition and further develop the focal point.
There are times when I know that my composition has far too much detail for a small card. In this case, I sketch out a larger drawing, then use a template (or just my fingers) like a viewfinder to find the part of the composition that will make into a nice card. This generally produces some of my best compositions, because the edges of objects run off the card and let the viewer’s mind suggest a bigger picture.
Step 4. Create the card and cut to size
What media should I use? Pencils, pens (including fountain, ball point and dip pens), colored pencils, markers, crayon, watercolor, gouache, acrylic paint – basically anything you want. Decoupage and collage are very popular if you don’t want to hand draw or hand paint your card. I haven’t had much success with pastels, charcoals and oil paint. Pastel and charcoal don’t give me much leeway for details. Oil paint takes far too long and requires a pretty stiff surface to work on. Sharp pencil points and small tips generally work the best for me. A word of warning: coldpress (not) cotton watercolor paper tends to wear out the smaller micron technical pens quickly. Dip pens are a good alternative – and less expensive.
I start with a minimum of 3” by 4” piece of paper so that I can later trim the edges that I don’t particularly like. Most cards I’ve received (and created) are made in a portrait format (when the card is viewed with it’s short edge down), not in landscape (when the card is viewed with the long edge down), but there is no rule for this. I sometimes wonder if it’s because collectors prefer to have cards facing the same way for storage and viewing.
When you are completely finished, ensure the card is dry (if necessary) and spray with fixative (if needed) prior to trimming the card to size. This way, if a side or corner warps from the drying or fixative (or if you use a clip to hang your card to dry), you can trim any bent parts off after. Watercolor paper that has warped can be wetted on the back side, laid flat, and stacked with weights or books on top to dry flat. I’ve heard of people ironing them with a dry iron, as well, but if you use something waxy like colored pencil you might run into issues with an iron.
If you love mixed media and want to glue on sequins, fabric, ribbons, etc., or you want to use bulky things like grommets, make double sure that your swap/trading partner is okay with it before you bulk up your card. Some collectors don’t want to deal with storing bulky cards, and some swap hosts don’t want to pay for extra postage or handling details.
Step 5. Prepare the card for trading
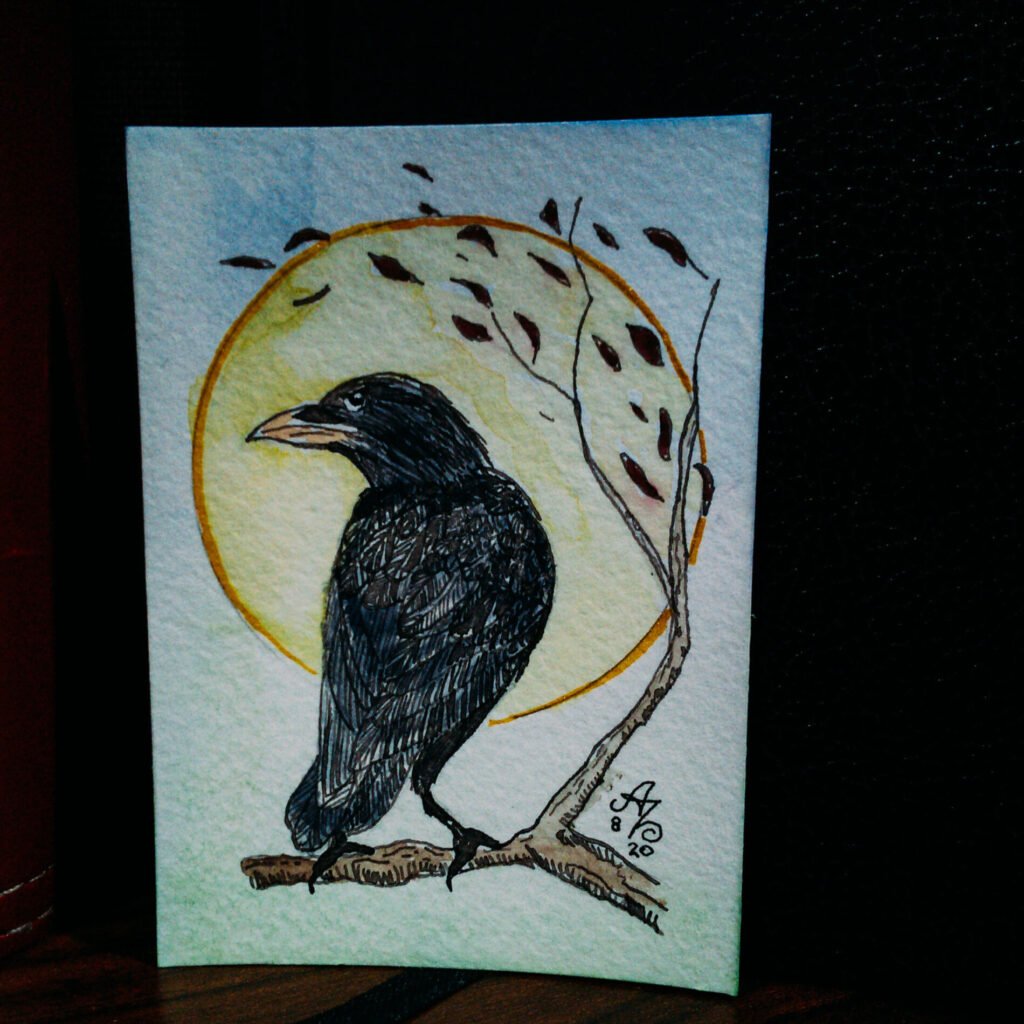
After your brand new card is finished, you’ll want to sign it, date it, and add any other details to the back of the card that are requested by the swap host or trade recipient. Many cards have the place where they originated as well as the name of the intended recipient on the back. Signatures can go on the front or the back, or sometimes I see initials (or a chop) on the front and signature on the back.
If you intend to create many cards, you may want to set up a computer template for a sticky label. I use the Avery 8163 labels, which are larger than the cards and should be trimmed to fit. They also add a little more stiffness to the card.
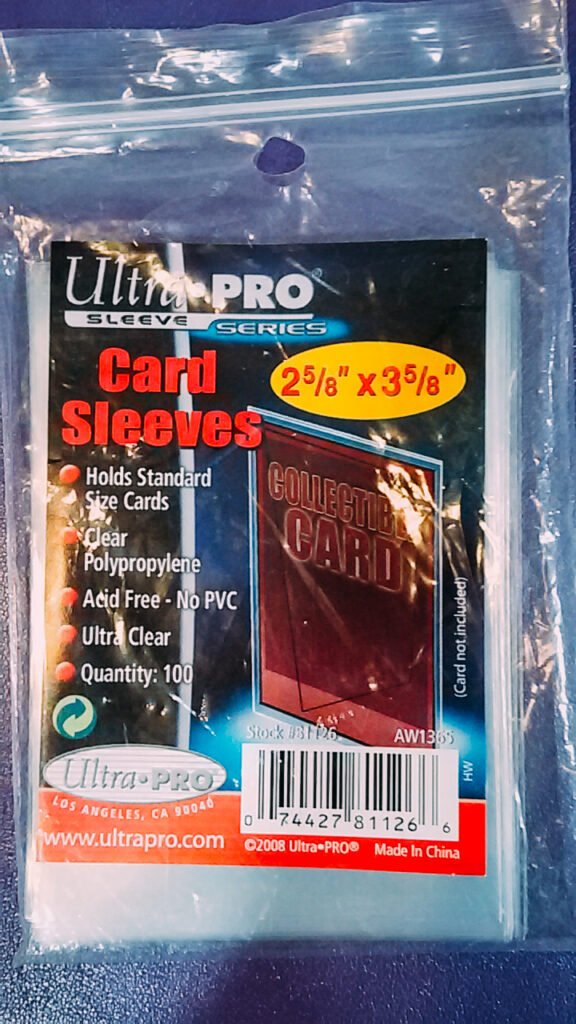
In addition, most recipients want to receive cards in plastic sleeves. These are the same plastic sleeves used for other trading cards, made of an acid free polypropylene that wont react with the media used on your card, in a 2 5/8” x 3 5/8” size. You can buy them in bulk very inexpensively at discount stores or Amazon. Place your card carefully in it’s sleeve before handing it around to be admired.
Step 6. Scan, photograph and post
Finally, after spending all that time to create this lovely little art work, you might want to scan or photograph it for your personal archive before placing it in the mail. Scanning at 300 dpi ensures you’ll see all your details, but a 72 dpi scan works just fine for your website or social media. Don’t forget to share your new creation with the world!
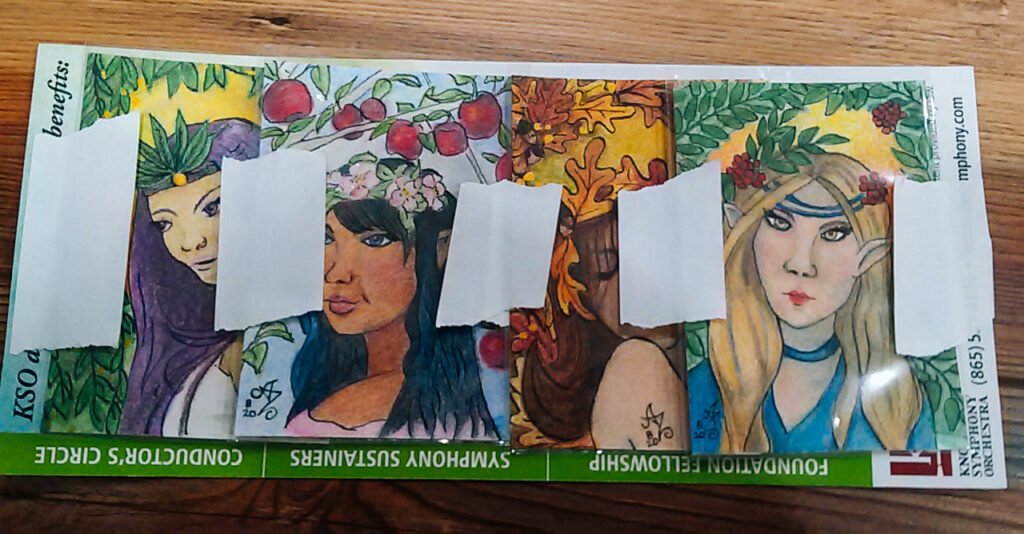
If you intend on mailing the card to a trader, it’s a good idea to take some precautions. First and foremost: make sure your card is in it’s clear plastic sleeve. Then, using painter’s tape or washi tape (or other tape that isn’t terribly sticky), tape the sleeve to a stiff piece of lightweight paperboard. Cut up cereal or trail bar boxes are great for this, but if it’s too heavy you’ll end up paying postage for something that essentially will be thrown out. The purpose of this board is to keep the card from being damaged by bending or spindling as it goes through postal machines. Multiple cards are usually taped side-by-side on the board. Use an envelope that is appropriate to the size of the paperboard; cut it down to fit as much space as possible in the envelope, don’t fold it to get it to fit. Bulky envelopes cause all sorts of problems, from tearing (causing potential damage to the card inside) to getting stuck in machines.
You can tape your card into a novelty card, if you like, or use extra bubble wrap or thin foam padding from other packaging. The last are good if you have 3D aspects to your cards that might poke through sleeves and/or envelopes. I’ve received some envelopes packaged so nicely that I can’t bear to throw away the wrapping. Mixed media artists are often appreciative of these little “bonus” touches because they can cut up and reuse the wrapping. Some traders include extra little “presents” like stickers and die cuts. Some artists will even appreciate decorative interiors on business envelopes because they use them in their art.
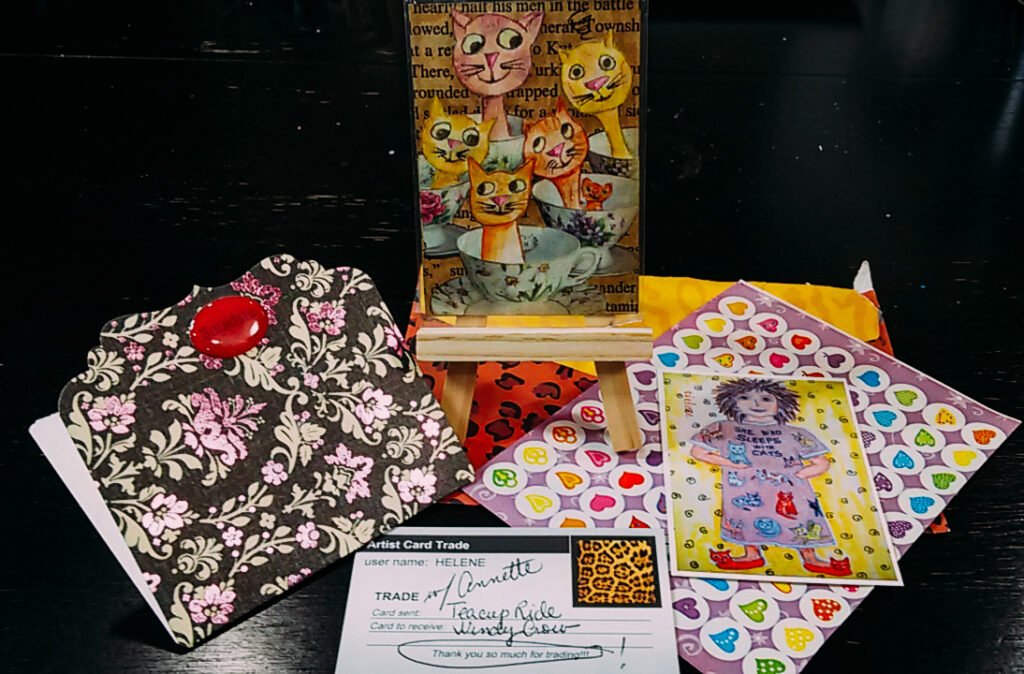
But unless your swap host requires you to do differently, the only thing you really need to include with your signed card (in it’s sleeve and other protective packaging) is a quick note thanking the recipient or host for the trade opportunity. A thank you note is good etiquette no matter what part of the world you come from.
Extra Tips
I think I’ve covered all the basics about making an ATC, but here are some extra tips for those who intend to make collecting a hobby.
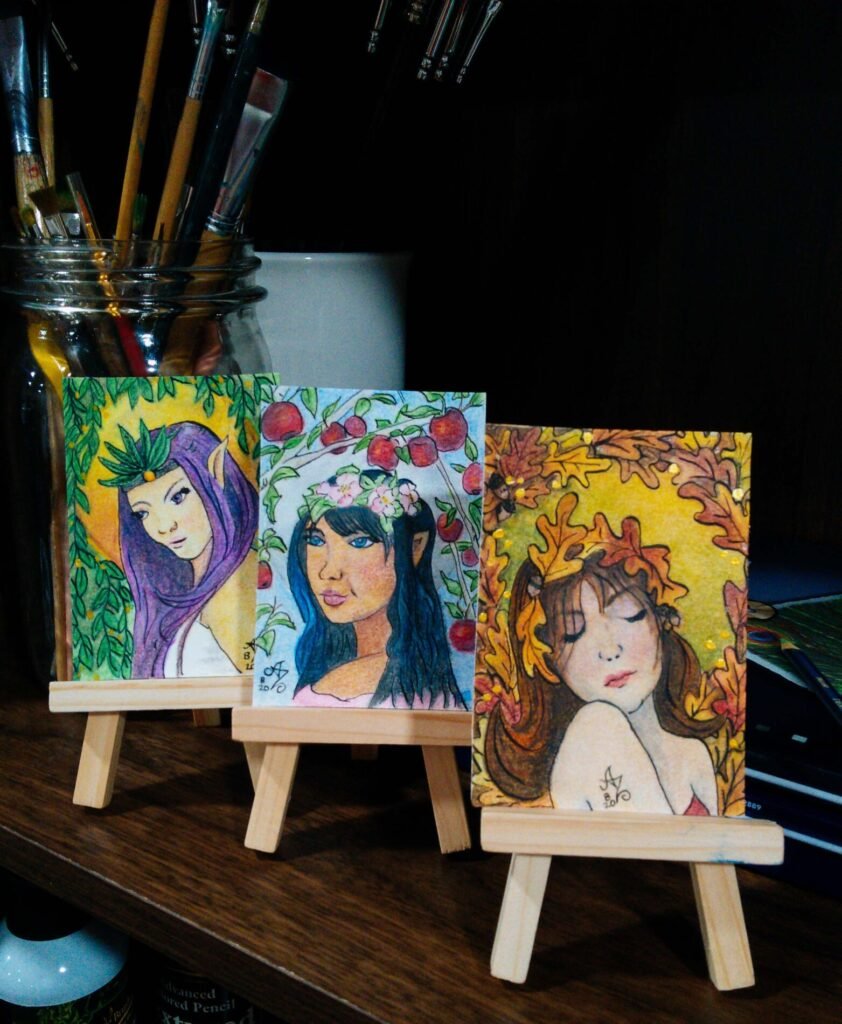
Create a portfolio of cards before trading or offering to trade. Why? Because once the word gets out, you might find that multiple collectors want the same card, or that someone wants more than one in your style. Having many cards available gives traders choices, and once you’re showing your cards for trade, you’ll find that you go through them pretty fast. In addition, building up your card portfolio gives you a lot of opportunity to experiment with the various inherent design issues of working on a small canvas.
Don’t commit to too many swaps in the beginning. It can take you longer than you think to make a card, let alone commit to making three or more for a swap. And who knows when life will interrupt work at the drawing board or easel? For beginners, especially, commit to a swap, complete your cards, and post them in the mail before committing to the next swap. After doing a few of them, you’ll know how long it takes and how far out you can extend yourself.
Number your cards, and keep a register of what you make. I keep mine in an Excel spreadsheet, but any register will do. Who knows? Someday, when you’re really famous, your cards may be worth something to collectors. Numbers will let them know which cards they’re missing in their set. If you create multiple cards of the same design, this is especially noteworthy for annotating a series (X of #) cards.
If you are in a swap, make sure you know when the cards are due. The host’s due date is usually the last day that they’ll accept cards in the mail, so double check how long it takes for the cards to get from your address to theirs to figure out what your last date for posting is. Nobody wants to see you spend money on next day delivery to get your cards delivered on time. And hosts (and your swap partners) don’t want to wait for delays because your cards are late. If you just can’t help being late, contact the host before mailing. They may ask that you withdraw from the swap – which is not always bad. The cards can still be traded, after all, just not through that particular swap.
In the same respect, ensure that you have enough postage on your cards to get them where they need to go. International mail not only takes longer but costs more! Insufficient postage will usually result in your envelope being returned to you – a delay you may not be able to compensate for. It’s always worth the time to double check that you’ve printed the correct address on the envelope and added enough postage for the weight. For that matter, double check that you’ve complied with every requirement a host lists for a swap. This may include return address labels (legibly printed), stamps or money for return postage, an extra envelope, etc.
Finally, it is always polite to send a thank you and a little something extra for the host of a swap. Most people include an additional card specifically for the host, but some hosts will state in the swap requirements that this isn’t necessary. Hosts invest their time and energy into creating the swap, monitoring participation during the swap, and collecting and returning the cards. They generally get nothing more out of it than the opportunity for first swap choice amongst the cards that are being mailed to them. So it’s nice to send along an extra card or a few stickers to show appreciation for their effort.
Trading artist cards is a fun way to show off your art and make new friends while building a collection of art that doesn’t take much space. I hope you’ll try it! You might find it an addictive hobby!