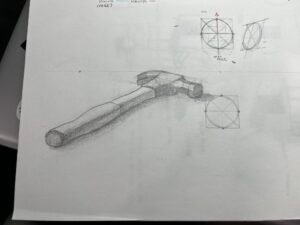
Week 2: Measuring proportions and angles
This week focused on using a pencil or straight-edged tool to measure angles and proportions—something I’ve done before but never practiced consistently.
- The videos felt long at first, but once I started drawing, I realized how much subtle technique I’d absorbed just by watching the demonstrations.
- I made a conscious effort to set up each object properly, propping them up with books and positioning myself for consistency.
- Holding my arm out to measure at full extension was surprisingly fatiguing—by the end of my 2-hour session, my shoulder had opinions.
- I didn’t have newsprint yet, so I used regular drawing paper. That, combined with a soft 2B pencil, led to a smudgy mess. I’ll try a harder pencil and use a paper towel under my drawing hand next time.
- The hardest part? Deciding what part of an object to use as my unit of measurement. I can see how this gets easier with repetition.
- Frustrations: shaky hands, less-than-great vision, and not being able to estimate fractional divisions very accurately yet.
That said, it was a worthwhile session. I’ll probably revisit this technique regularly.
Bonus: I found that using a proportional divider on the paper gave me far better results than trying to use a paintbrush held at arm’s length.
Week 3: Value and Shadow Scales
I was confident going into this one—I’ve done plenty of value scales before—but it still managed to teach me something new.
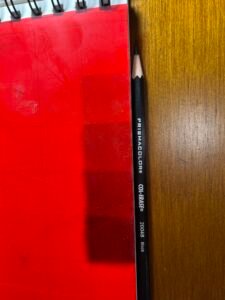
We began with basic 3- and 5-step value scales in graphite and a color of our choice. I picked a sanguine Conté pencil as my color option.
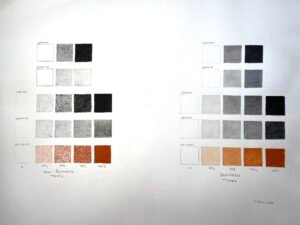
On the left are the scales made without blending, and on the right are the blended versions. I tried various blending tools for smoother transitions, but the blending stump worked the best. Turns out, when your blending stump is fully loaded with dark graphite, you can make lighter values without using a pencil at all—just smear it across the page
I used a red acetate sheet to check consistency between values, a trick I learned years ago that’s still super handy.
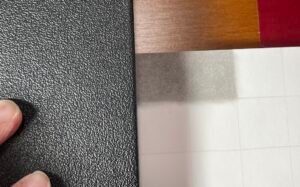
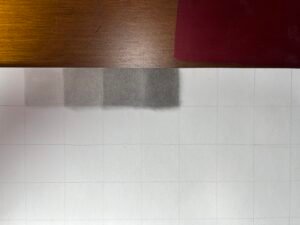
After completing these, I learned a new trick: how to create a value scale based on the cast shadow of an object. The result is a set of tonal values that is specific to the lighting, paper, and drawing medium I'm working with. I used a black sketchbook lifted off the paper by a roll of masking tape.
The first step is to create a square that matches the cast shadow tone exactly. Then I created a matching square next to it that would be used as the basis of the darker value. Once I moved the sketchbook to shadow the first square, I could see how much darker the second square had to be. So I got it as dark as the first square (shadowed), then repeated the whole process until I made the darkest square I could possibly make with my pencil.
By the time I hit the fifth value, I was piling on graphite like frosting. So I went back with my red acetate to see how consistent the tonal changes were and touched up my squares accordingly.
This lesson made it clear just how much your choice of pencil grade affects what tonal range you can actually achieve. I’m tempted to redo the exercise using a full range—from 14B all the way to 4H—to see how many distinct values I can get from each.
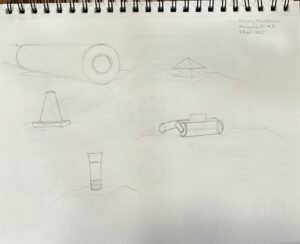
Week 4: Drawing 3D Forms in Perspective
This wasn't a technical perspective deep-dive, but rather an intuitive approach to sketching forms in space.
We started with cubes, then moved to cylinders and spheres. The key tip: begin with a simplified cube to establish perspective, then sculpt the form from there.
I’ve taken technical perspective courses before, so the early part felt easy. But once I started sketching more complex objects freehand, I found myself getting frustrated.
Ellipses in particular challenged me—especially when trying to judge how their width changes relative to the eye line. But I know I’ll get more practice with that soon.
The takeaway: practice drawing freehand ellipses often, and use perspective cubes as a foundation when in doubt.
Final assignment: sketch 5 household objects with attention to perspective. Helpful but humbling.
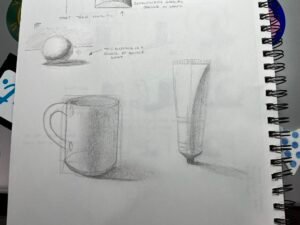
Week 5: Principles of Light and Shadow
This was a strong refresher on identifying light and shadow relationships in both simple and complex forms.
I really liked this week. It clarified a few things I’d forgotten, like the exact placement of the darkest tones in cast shadows.
We practiced recognizing and drawing the core shadow, highlight, cast shadow, and reflected light on various forms.
It felt good to slow down and observe how the light behaves across form transitions. Even familiar concepts felt fresh with deliberate attention.
Ongoing Thoughts
While a lot of this has been review, it's been anything but mindless. Revisiting foundational concepts with a trained eye and better tools has made the process more engaging—and more useful—than I expected. I’m seeing improvement not just in technical skill but in observational awareness and patience. I may not love every exercise in the moment, but every week leaves me with something valuable.
Onward to Week 6.